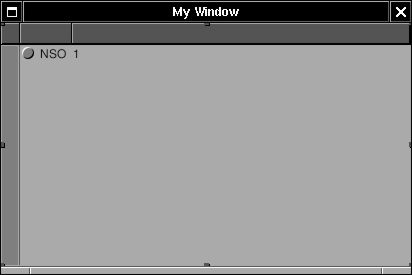
NSOutlineView 是 NSTableView 的子類別. 唯一的差別是 NSOutlineView 的資料來源是樹狀結構, 可以展開或關閉, 而 NSTableView 則是使用陣列記錄每一筆資料. 在這裡示範使用 NSOutlineView 顯示系統相關資訊.
使用 Gorm 產生一個新的程式 (New Application). 拖一個 NSOutlineView 到視窗中.
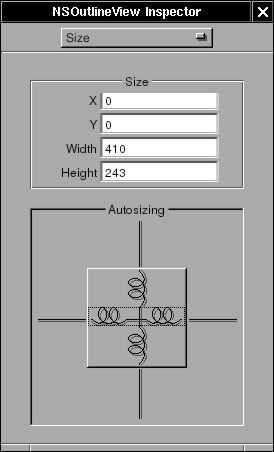
改變 NSOutlineView 的自動改變大小屬性.
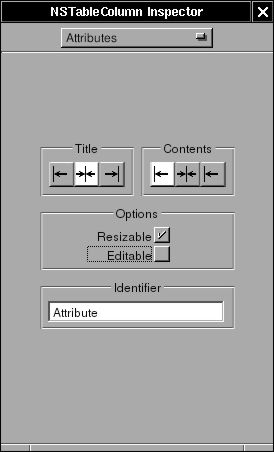
在 column 上點兩下以選擇該 column

取消 "Editable" 並將第一個 column 的 identifier 改成 "Attribute", 第二個改成 "Value".
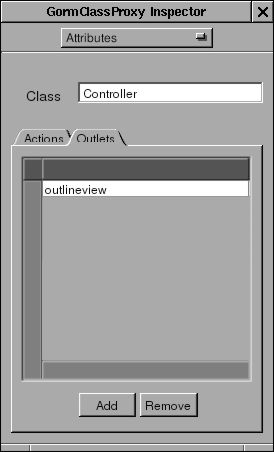
使用者介面完成了. 要製做這個使用者介面的控制者. 繼承自 NSObject, 產生一個 "Controller" 類別.
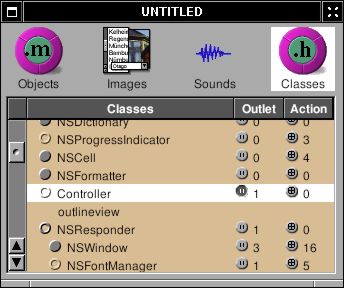
加入一個 outlet 稱為 "outlineview".
產生 Controller 物件. 將 "outlineview" outlet 連到 NSOutlineView 上. 要確認不是連到 NSScrollView 或 NSTableColumn.
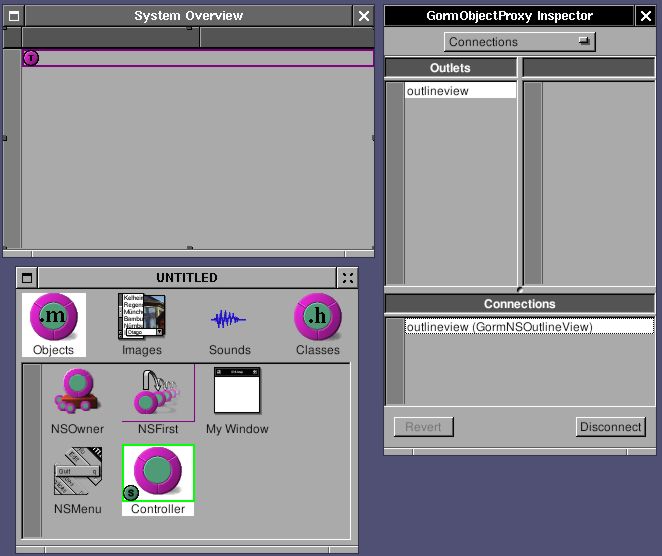
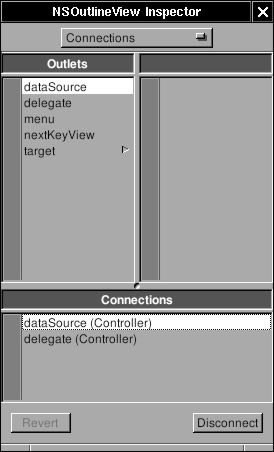
NSOutlineView 是 NSTableView, 因此也必需指定其資料來源 (data source) 及代理者 (delegate). 連結 NSOutlineView 的 dataSource 及 delegate 至 Controller.
最後, 指定 Controller 為 NSApp 的代理者.
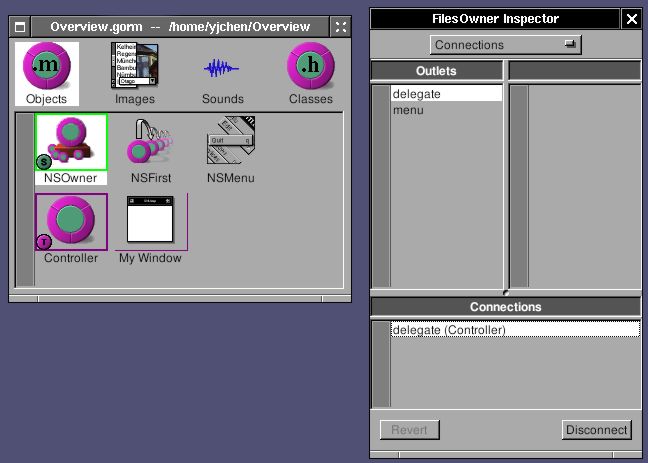
將這個使用者介面存成 Overview.gorm 檔. 產生 Controller 的程式碼.
因為 NSOutlineView 的資料是樹狀結構, 在這裡使用很簡單的結點 (Node) 來建立樹狀結構.
Node.h
#ifndef _Overview_Node_
#define _Overview_Node_

#include <Foundation/NSObject.h>

@class NSArray;
@class NSMutableArray;
@class NSString;

@interface Node: NSObject
{
  NSString *name;
  NSString *value;
  NSMutableArray *children;
}

- (void) setName: (NSString *) name;
- (NSString *) name;
- (void) setValue: (NSString *) value;
- (NSString *) value;
- (void) addChild: (id) child;
- (NSArray *) children;
@end

#endif /* _Overview_Node_ */
Node.m
#include "Node.h"
#include <Foundation/Foundation.h>

@implementation Node

- (id) init
{
  self = [super init];

  children = [NSMutableArray new];

  return self;
}

- (void) setName: (NSString *) string
{
  ASSIGN(name, string);
}

- (NSString *) name
{
  return name;
}

- (void) setValue: (NSString *) string
{
  ASSIGN(value, string);
}

- (NSString *) value
{
  return value;
}

- (void) addChild: (id) child
{
  [children addObject: child];
}

- (NSArray *) children
{
  return children;
}

- (void) dealloc
{
  RELEASE(name);
  RELEASE(value);
  RELEASE(children);
  [super dealloc];
}

@end
接下來會使用這些結點來建立樹狀結構.
NSTableView 需要這兩個 methods 來顯示資料:
- (int) numberOfRowsInTableView: (NSTableView *) tableView;

- (id) tableView: (NSTableView *) tableView
       objectValueForTableColumn: (NSTableColumn *) column
       row: (int) row;
因為樹狀資料結構的關係, NSOutlineView 需要四個 methods 來顯示資料:
- (id)outlineView: (NSOutlineView *)outlineView
            child: (int)index
           ofItem: (id)item;

- (BOOL)outlineView: (NSOutlineView *)outlineView
        isItemExpandable: (id)item;

- (int)outlineView: (NSOutlineView *)outlineView
       numberOfChildrenOfItem: (id)item;

- (id)outlineView: (NSOutlineView *)outlineView
      objectValueForTableColumn:(NSTableColumn *)tableColumn
      byItem:(id)item;
"Item" 即為資料結構中的結點, 如果 Item 是 nil, 表示在尋問根結點 (root node). 從根結點開始, NSOutlineView 會尋問每一個結點有多少個子結點, 這個結點是否能展開, 顯示結點的資料, 以及取得所有的子結點. 當 NSOutlineView 尋問過所有節點之後, 所有的資料便顯示出來了.
因此, 要先把樹狀結構建立起來:
Controller.h
/* All Rights reserved */

#include <AppKit/AppKit.h>

@class Node;

@interface Controller : NSObject
{
  id outlineview;
  Node *root;

}
@end
Controller.m
/* All Rights reserved */

#include <AppKit/AppKit.h>
#include "Controller.h"
#include "Node.h"

@implementation Controller

- (id) init
{
  Node *child, *temp;

  self = [super init];

  root = [Node new];

  child = [Node new];
  [child setName: @"System"];

  /* Add operating system */
  temp = [Node new];
  [temp setName: @"Operating System"];
  [temp setValue: [[NSProcessInfo processInfo] operatingSystemName]];
  [child addChild: temp];
  RELEASE(temp);

  /* Add user name */
  temp = [Node new];
  [temp setName: @"User Name"];
  [temp setValue: NSUserName()];
  [child addChild: temp];
  RELEASE(temp);

  /* Add home directory */
  temp = [Node new];
  [temp setName: @"Home Directory"];
  [temp setValue: NSHomeDirectory()];
  [child addChild: temp];
  RELEASE(temp);

  [root addChild: child];
  RELEASE(child);

  return self;
}

- (void) dealloc
{
  RELEASE(root);
  [super dealloc];
}
首先建立根節點, 加上一個 "System" 節點. 再加入三個節點進入 "System" 節點. 這是一個非常簡單的樹狀結構. 有了樹狀結構, 便可以在 NSOutlineView 中顯示出來.
Controller.m
- (id) outlineView: (NSOutlineView *) outlineView
             child: (int) index
            ofItem: (id) item
{
  /* Root */
  if (item == nil)
    return [[root children] objectAtIndex: index];

  /* Others */
  if ([[item children] count])
    return [[item children] objectAtIndex: index];
  else
    return nil;
}

- (BOOL) outlineView: (NSOutlineView *) outlineView
         isItemExpandable: (id) item
{
  /* Root */
  if (item == nil)
    return YES;

  /* Others */
  if ([[item children] count])
    return YES;
  else
    return NO;
}

- (int) outlineView: (NSOutlineView *) outlineView
        numberOfChildrenOfItem: (id) item
{
  /* Root */
  if (item == nil)
    return [[root children] count];

  /* Others */
  return [[item children] count];
}

- (id) outlineView: (NSOutlineView *) outlineView
       objectValueForTableColumn: (NSTableColumn *) tableColumn
       byItem: (id) item
{
  if ([[tableColumn identifier] isEqualToString: @"Attribute"])
    return [(Node *)item name];
  else
    return [item value];
}
程式碼很清楚, 只是要特別處理根結點的狀況. 當 item 為 nil 時, 就是尋問根結點的資料.
再完成 main.m 及 GNUmakefile 即可. 程式碼在此: Overview-src.tar.gz
了解如何在 NSOutlineView 中顯示資料後, 便可輕易的加入更多資料.
Controller.m
- (id) init
{
  Node *child, *temp;
  NSCalendarDate *date;
  NSRect frame;
  id object;

#define ADD_NAME_VALUE(name, value) \
        temp = [Node new]; \
        [temp setName: name]; \
        [temp setValue: value]; \
        [child addChild: temp]; \
        RELEASE(temp);


  self = [super init];

  root = [Node new];

  child = [Node new];
  [child setName: @"System"];

  /* operating system */
  ADD_NAME_VALUE(@"Operating System", [[NSProcessInfo processInfo] operatingSystemName]);

  /* user name */
  ADD_NAME_VALUE(@"User Name", NSUserName());

  /* home directory */
  ADD_NAME_VALUE(@"Home Directory", NSHomeDirectory());

  /* gnustep root directory */
  ADD_NAME_VALUE(@"GNUstep Directory", NSOpenStepRootDirectory());

  /* host and address */
  ADD_NAME_VALUE(@"Host", [[NSHost currentHost] name]);
  ADD_NAME_VALUE(@"Address", [[NSHost currentHost] address]);

  /* Screen */
  ADD_NAME_VALUE(@"Screen Depth", [[NSNumber numberWithInt: [[NSScreen mainScree
n] depth]] description]);
  frame = [[NSScreen mainScreen] frame];
  object = [NSString stringWithFormat: @"%d x %d", (int)frame.size.width, (int)f
rame.size.height];
  ADD_NAME_VALUE(@"Screen Size", object);

  [root addChild: child];
  RELEASE(child);

  child = [Node new];
  [child setName: @"Date & Time"];

  /* Time Zone */
  ADD_NAME_VALUE(@"System Time Zone", [[NSTimeZone systemTimeZone] timeZoneName]
);
  ADD_NAME_VALUE(@"Local Time Zone", [[NSTimeZone localTimeZone] timeZoneName]);

  /* Date */
  date = [NSCalendarDate calendarDate];
  [date setCalendarFormat: @"%a, %b %e, %Y"];
  ADD_NAME_VALUE(@"Date", [date description]);
  [date setCalendarFormat: @"%H : %M : %S"];
  ADD_NAME_VALUE(@"Time", [date description]);

  [root addChild: child];
  RELEASE(child);

  child = [Node new];
  [child setName: @"Text Related"];

  /* default encoding */
  ADD_NAME_VALUE(@"Default Encoding", [NSString localizedNameOfStringEncoding: [NSString defaultCStringEncoding]]);

  /* Font */
  ADD_NAME_VALUE(@"System Font", [[NSFont systemFontOfSize: [NSFont systemFontSize]] displayName]);
  ADD_NAME_VALUE(@"System Font Size", [[NSNumber numberWithFloat: [NSFont systemFontSize]] description]);
  ADD_NAME_VALUE(@"System Font Encoding", [[NSFont systemFontOfSize: [NSFont systemFontSize]] encodingScheme]);
  ADD_NAME_VALUE(@"System Bold Font", [[NSFont boldSystemFontOfSize: [NSFont systemFontSize]] displayName]);

  [root addChild: child];
  RELEASE(child);

  return self;
}
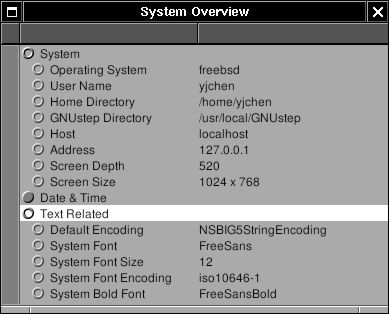
Now, it looks better:
在這個程式中, 當視窗關閉時程式還在. 在這裡使用 NSApp 的代理者來結束程式.
Controller.m
- (BOOL) applicationShouldTerminateAfterLastWindowClosed: (id) sender
{
  return YES;
}