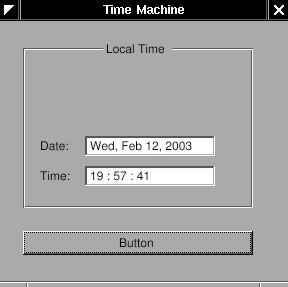
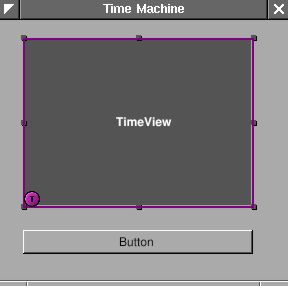
在 Gorm 中也可以加入自訂的圖形元件, 而不使用 Gorm 內建的. 在這裡做一個顯示時間的圖形元件. 下圖中白色框線內即為自訂的圖形元件.
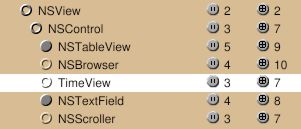
在 Gorm 中使用自訂元件時, 要先設計好其類別. 圖形元件可以繼承自 NSView 或 NSControl. NSView 要是是顯示, NSControl 則可以接受使用者的動作. NSControl 也是繼承自 NSView. 在這範列中, 要製做的元件稱為 TimeView, 繼承自 NSControl. 先選 NSResponder 旁的小圓鈕, 展開其子類別 (Subclass), 再展開 NSView 的字類別. 許多圖形元件都是繼承自 NSControl, 如 NSTextField.

選 NSControl, 選 "Classes->Create Subclass..." 產生新類別. 點兩下修改名稱為 "TimeView".
TimeView 同時也繼承了 NSControl 的三個 outlets 及七個 actions.
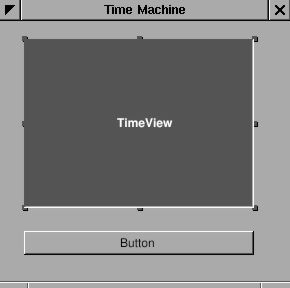
接著建立以下的圖形介面.

選其中的 CustomView, 選 Inspector 的 Attributes, 選 TimeView 類別. 如此便指定 CustomView 使用 TimeView 類別.

這時 CustomView 變成了 TimeView.
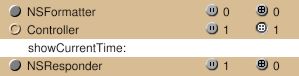
如同之前建立一個 Controller, 加入 timeView outlet 及 -showCurrentTime: action.
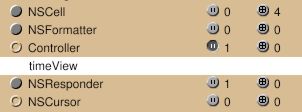
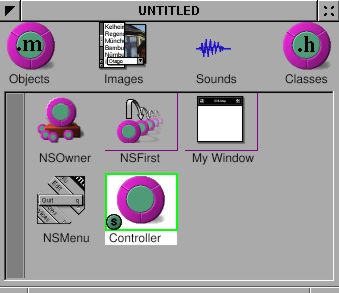
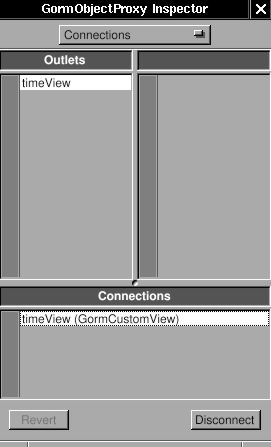
產生 Controller 物件, 連結 timeView outlet 至 TimeView 這個自訂元件. 連結按鈕到 -showCurrentTime 這個 action.
最後, 產生 TimeView 及 Controller 的程式碼, 並將圖形介面存檔成 TimeMachine.gorm. 這就是在 Gorm 中使用自訂元件的方法.
接下來就是要製做這個自訂元件, TimeView. 這個 TimeView 實際上是由 NSBox 及 NSTextView 所組成的. NSBox 即為其外框, NSTextField 則用來顯示字串. 做成自訂元件的好除了以後可以反複使用. 繼承自 NSView 的類別, 其啟始呼叫是 -initWithFrame: 因此要在 -initWithFrame 中加入要顯示的元件.
TimeView.h:
#import <AppKit/AppKit.h>

@interface TimeView : NSControl
{
   NSTextField *labelDate, *labelTime;
   NSTextField *localDate, *localTime;
   NSCalendarDate *date;
}

- (NSCalendarDate *) date;
- (void) setDate: (NSCalendarDate *) date;

@end
TimeView.m:
#import <AppKit/AppKit.h>
#import "TimeView.h"

@implementation TimeView
- (id) initWithFrame: (NSRect) frame
{
   NSBox *box;

   self = [super initWithFrame: frame];
   box = [[NSBox alloc] initWithFrame: NSMakeRect(0, 0,
                                                  frame.size.width,
                                                  frame.size.height)];
   [box setBorderType: NSGrooveBorder];
   [box setTitlePosition: NSAtTop];
   [box setTitle: @"Local Time"];

   labelDate = [[NSTextField alloc] initWithFrame: NSMakeRect(10, 45, 35, 20)];
   [labelDate setStringValue: @"Date: "];
   [labelDate setBezeled: NO];
   [labelDate setBackgroundColor: [NSColor windowBackgroundColor]];
   [labelDate setEditable: NO];

   labelTime = [[NSTextField alloc] initWithFrame: NSMakeRect(10, 15, 35, 20)];
   [labelTime setStringValue: @"Time: "];
   [labelTime setBezeled: NO];
   [labelTime setBackgroundColor: [NSColor windowBackgroundColor]];
   [labelTime setEditable: NO];

   localDate = [[NSTextField alloc] initWithFrame: NSMakeRect(55, 45, 130, 20)];
   localTime = [[NSTextField alloc] initWithFrame: NSMakeRect(55, 15, 130, 20)];

   [box addSubview: labelDate];
   [box addSubview: labelTime];
   [box addSubview: localDate];
   [box addSubview: localTime];
   RELEASE(labelDate);
   RELEASE(labelTime);
   RELEASE(localDate);
   RELEASE(localTime);

   [self addSubview: box];
   RELEASE(box);

   return self;
}

- (NSCalendarDate *) date
{
   return date;
}

- (void) setDate: (NSCalendarDate *) aDate
{
   ASSIGN(date, aDate);
   [date setCalendarFormat: @"%a, %b %e, %Y"];
   [localDate setStringValue: [date description]];
   [date setCalendarFormat: @"%H : %M : %S"];
   [localTime setStringValue: [date description]];
}

- (void) dealloc
{
  RELEASE(date);
  [super dealloc];
}

@end
有些 Gorm 產生的程式碼不一定會用到, 因此可以直接刪除. 在 TimeView.h, 宣告了四個 NSTextField 來顯示時間, 一個 NSCalendarDate 來記錄時間. 也增加兩個 methods 來更改時間. 這是典型的做法. 在 initWithFrame 中, 先設定好 NSBox, 再加入四個 NSTextField 到 NSBox. NSBox 便成為 NSTextField 的 Superview, 而 NSTextField 便成為 NSBox 的 Subview. Superview 會保留 (retain) subview, 所以在這裡可以將其釋放 (release). 最後再將 NSBox 加入 TimeView 中, 這時 NSBox 成為 TimeView 的 subview, 而 TimeView 成為 NSBox 的 superview.
其他部份就簡單許多了:
Controller.h:
#import <AppKit/AppKit.h>
#import "TimeView.h"

@interface Controller : NSObject
{
   id timeView;
}
- (void) showCurrentTime: (id)sender;
@end
Controller.m:
#import <AppKit/AppKit.h>
#import "Controller.h"

@implementation Controller
- (void) showCurrentTime: (id)sender
{
   /* insert your code here */
   NSCalendarDate *date = [NSCalendarDate date];
   [timeView setDate: date];
}

@end
main.m:
#import <AppKit/AppKit.h>

int main(int argc, const char *argv[])
{
   return NSApplicationMain (argc, argv);
}
GNUmakefile:
include $(GNUSTEP_MAKEFILES)/common.make

APP_NAME = TimeMachine
TimeMachine_HEADERS = Controller.h TimeView.h
TimeMachine_OBJC_FILES = main.m Controller.m TimeView.m
TimeMachine_RESOURCE_FILES = TimeMachineInfo.plist TimeMachine.gorm
TimeMachine_MAIN_MODEL_FILE = TimeMachine.gorm

include $(GNUSTEP_MAKEFILES)/application.make
在 Gorm 中, 並沒有產生 TimeView 物件. 因為在圖形介面產生一個自訂元件, 並指定該自訂元件為 TimeView, 便等同產生一個 TimeView 物件. 而 Controller 因為不是圖形元件, 所以必需自行產生一個物件, 才能連結 outlet 及 action.